 Stephanie Walsh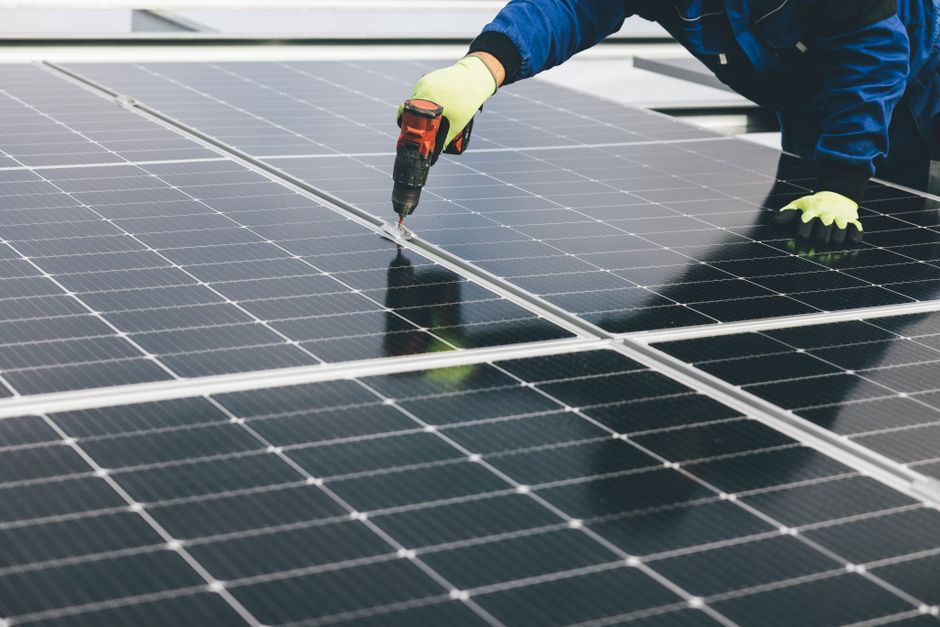
Let me be straight with you: a licensed electrician friend of mine once said that pulling a permit for a solar job is “just paperwork,” but skipping it is “a lawsuit waiting to happen.” He wasn’t wrong. Every year, homeowners lose insurance coverage, face forced system removal, or get slapped with fines because they installed solar without permits, without inspections, or without understanding what they were actually doing to their electrical system. DIY solar is absolutely possible. I’ve helped dozens of homeowners do it themselves, save $10,000 to $20,000 in labor costs, and end up with a system they fully understand. But “DIY” doesn’t mean “shortcuts.” It means you’re the one responsible for doing it right.
Is DIY Solar Actually Legal? Understanding Permits, Inspections, and Utility Approval
Start here before you buy a single panel.
In most U.S. jurisdictions, you can legally pull your own permit as a homeowner for work on your own residence. This is called an “owner-builder” exemption, and it covers electrical work in many states. But the rules vary significantly by county and city, so call your local building department before you do anything else. Ask them directly: “Can I pull a permit as a homeowner for a residential solar installation?”
Once you pull the permit, you’ll typically need two inspections. One covers the structural mounting, and one covers the electrical connections. After both pass, your utility company issues what’s called Permission to Operate (PTO), which is the formal go-ahead to flip the switch and start generating power. No PTO means you’re generating electricity illegally, and your utility can disconnect you.
If you’re in an HOA, that’s a separate layer. Many states have Right to Solar laws that limit what an HOA can actually block. You can read more in our breakdown of HOA solar panel rules and what your legal protections actually look like under Right to Solar laws explained. In short: your HOA can regulate placement and aesthetics in some states, but they generally can’t outright deny you the ability to install solar.
The U.S. Department of Energy’s homeowner’s guide to going solar is a solid starting point for understanding the interconnection process and what to expect from your utility.
Sizing Your System: How Much Solar Do You Actually Need?
Most DIYers stumble right here. They either overbuy (sinking money into capacity they’ll never use) or underbuy (then spend the next decade resenting their electric bills).
Pull up your last 12 months of electric bills and find your total annual kWh consumption. Say you use 12,000 kWh per year. Your location matters enormously because a panel in Phoenix produces about 30% more electricity per year than the same panel in Seattle. The National Renewable Energy Laboratory’s PVWatts tool is free, takes about 10 minutes, and gives you a location-specific production estimate that’s accurate enough to size your system.
Here’s the basic formula:
System size (kW) = Annual kWh usage / (365 days x peak sun hours)
For our 12,000 kWh example in a 5-peak-sun-hour location: 12,000 / (365 x 5) = 6.58 kW system. Round up to 7 kW to account for real-world losses like heat, shading, and wiring inefficiency.
A few sizing realities to keep in mind:
- Modern residential panels are typically 400 to 450 watts each. A 7 kW system needs roughly 16 to 18 panels.
- Your roof space limits you. A 400W panel is about 22 square feet. Do the math against your usable south-facing roof area.
- If you’re adding an EV or a heat pump in the next few years, size up now. It’s cheaper than expanding later.
- Check your main electrical panel. A 7 kW inverter system typically requires a 200-amp service panel at minimum, and your busbar needs enough space to accept the solar backfeed. An undersized or full panel means a service upgrade before you can even interconnect.
Your roof type matters too. Composition shingle is the easiest to work with. Metal roofs require different mounting hardware. Flat roofs use ballasted or tilted racking systems. If you’ve got a flat roof, there are specific considerations worth understanding before you buy any hardware.
Equipment Selection: Panels, Inverters, and Racking
Do It Yourself Solar Power? - Easy DIY Solar Panel Installation! · JerryRigEverything on YouTube
| Inverter Type | Best For | Cost | Monitoring |
|---|---|---|---|
| String inverter | Simple roofs, no shading | Lowest | System-level |
| Microinverters (e.g., Enphase IQ8) | Complex roofs, shading, phased expansion | Highest | Panel-level |
| DC optimizers + string inverter (e.g., SolarEdge) | Moderate shading, some complexity | Mid-range | Panel-level |
You have more good options today than ever before. You also have more ways to buy garbage from a random overseas supplier, so pay attention.
Panels: Stick to Tier 1 manufacturers. That list includes names like Qcells, REC, Jinko Solar, LONGi, and Canadian Solar. Tier 1 doesn’t mean “best performance,” it means the manufacturer has a financially stable company backing their 25-year product warranty. A 25-year warranty from a company that won’t exist in five years is worthless.
Inverters: You have three main options:
| Inverter Type | Best For | Cost | Monitoring |
|---|---|---|---|
| String inverter | Simple roofs, no shading | Lowest | System-level |
| Microinverters (e.g., Enphase IQ8) | Complex roofs, shading, phased expansion | Highest | Panel-level |
| DC optimizers + string inverter (e.g., SolarEdge) | Moderate shading, some complexity | Mid-range | Panel-level |
For a straightforward south-facing roof with no shade obstructions, a string inverter from SMA or Fronius paired with a good battery-ready setup is perfectly fine and significantly cheaper. If you have a tree shading one corner of your array in the afternoon, microinverters will recover dramatically more production.
Racking: IronRidge and Unirac are the two most commonly permitted racking systems in the U.S. Use one of them. Generic racking from an unknown brand is difficult to get permitted and may not meet local wind or snow load requirements.
Wiring: Use UV-resistant PV wire (UL 4703 listed), rated for your system’s voltage. Don’t substitute regular THWN-2 wire for outdoor PV runs. It’s not code-compliant and will degrade faster than you want to think about.
Step-by-Step Installation Overview
This isn’t a complete construction manual, but it gives you the sequence and where the real risks are.
Step 1: Design and permit submission
Draw a site plan and electrical diagram. Most AHJs (Authorities Having Jurisdiction) want a system schematic showing panel layout, inverter specs, string sizing, and how it connects to your main panel. Some jurisdictions have simplified permit applications for systems under 10 kW.
Step 2: Structural mounting
Locate your roof rafters using a stud finder, then mark your lag bolt locations. Every mount point needs to hit a rafter, not just the sheathing. Use flashing kits designed for your roofing material. This is where most DIY water damage comes from: improper flashing around penetrations. Take your time here. Use Butyl tape sealant under your flashing, not just caulk.
Step 3: Install racking rails
Attach your rails to the mounts and level them carefully. Misaligned rails make panel installation frustrating and can cause uneven stress on the panels over time.
Step 4: Run conduit and rough-in wiring
Run your PV source circuit wiring from the roof, down through conduit, to your inverter location (usually near your main panel). Use weatherproof conduit fittings everywhere. This wiring run needs to be in place before your first inspection.
Step 5: Mount and wire panels
Slide panels into the racking, clamp them down, and make your DC wiring connections. If you’re using string inverters, wire your panels in series according to the string sizing design. Label everything. Future-you will thank present-you.
Step 6: Inverter installation and AC wiring
Mount the inverter, connect DC inputs, and wire the AC output to a new dedicated breaker in your main panel. This is where your electrical background matters most. Backfed breakers have specific requirements, including a 120% rule: your panel busbar rating must be at least 120% of the main breaker plus the solar backfeed breaker.
Step 7: Inspections and PTO
Call for your inspections. After passing both, submit your inspection results to your utility. PTO timelines vary: some utilities take a week, others take 8 to 10 weeks. Don’t energize the system before PTO.
A good home energy monitor installed during this phase will give you granular insight into your consumption patterns and help you validate your system’s production immediately after startup. (As an Amazon Associate this site earns from qualifying purchases.)
The Honest Limitations of DIY Solar
I’m not here to scare you off. But you deserve a realistic picture.
Rooftop work is dangerous. Falls from ladders and roofs kill people every year, and working while carrying 50-pound panels adds risk. Use roof anchors, wear a harness if you’re on any pitch above 3:12, and don’t work alone.
High-voltage DC electricity is unforgiving. A fully illuminated solar array produces lethal voltage the moment panels are connected together, even before anything is hooked to an inverter. There is no “off” switch on the solar side until you physically cover the panels or disconnect them. Treat every DC connection as live.
Some jurisdictions won’t allow homeowners to do their own interconnection wiring. If that’s your situation, you can still DIY everything up to the inverter and hire a licensed electrician for the final grid connection. That still saves you thousands.
If at some point you decide the project is beyond what you want to tackle, our guide on how to choose a solar company can help you vet installers intelligently, and our breakdown of red flags when hiring a solar installer will keep you from getting burned by a bad contractor.
DIY solar isn’t for everyone, and there’s no shame in deciding that hiring a professional makes more sense for your situation. But if you’re comfortable with heights, have some electrical knowledge, and are willing to do the permit work properly, you can absolutely install a system that performs just as well as one installed by a $45,000 contractor quote. The homeowners I’ve seen do this best treat it like a serious construction project, not a weekend hack. Plan carefully, follow code, and get your inspections. The payoff, both financial and personal, is real.
Sources
- homeowner’s guide to going solar
- Emporia Smart Outlet with Energy Monitoring
- P3 Kill A Watt Electricity Usage Monitor
- Govee WiFi Smart Plug with Energy Monitoring
Disclosure: As an Amazon Associate, we earn a small commission from qualifying purchases at no extra cost to you. We only recommend products that genuinely support the topics covered in this article.
- Renogy 200W Solar Starter Kit + 30A Charge Controller (~$169), Complete beginner solar kit, 200W monocrystalline panel, charge controller, and mounting hardware included.
- Renogy 2×100W Monocrystalline Solar Panels (~$99), Expandable 200W panel set from the most trusted DIY solar brand, used widely in off-grid and home backup systems.
- Renogy 200W Solar Kit + 20A MPPT Controller (~$199), 200W panel kit with MPPT charge controller for maximum energy harvest.
Recommended Resources
Disclosure: As an Amazon Associate, we earn a small commission from qualifying purchases at no extra cost to you. We only recommend products that genuinely support the topics covered in this article.
- Renogy 200W Solar Starter Kit + 30A Charge Controller (~$169), Complete beginner solar kit, 200W monocrystalline panel, charge controller, and mounting hardware included.
- Renogy 2×100W Monocrystalline Solar Panels (~$99), Expandable 200W panel set from the most trusted DIY solar brand, used widely in off-grid and home backup systems.





