 Tom Bradley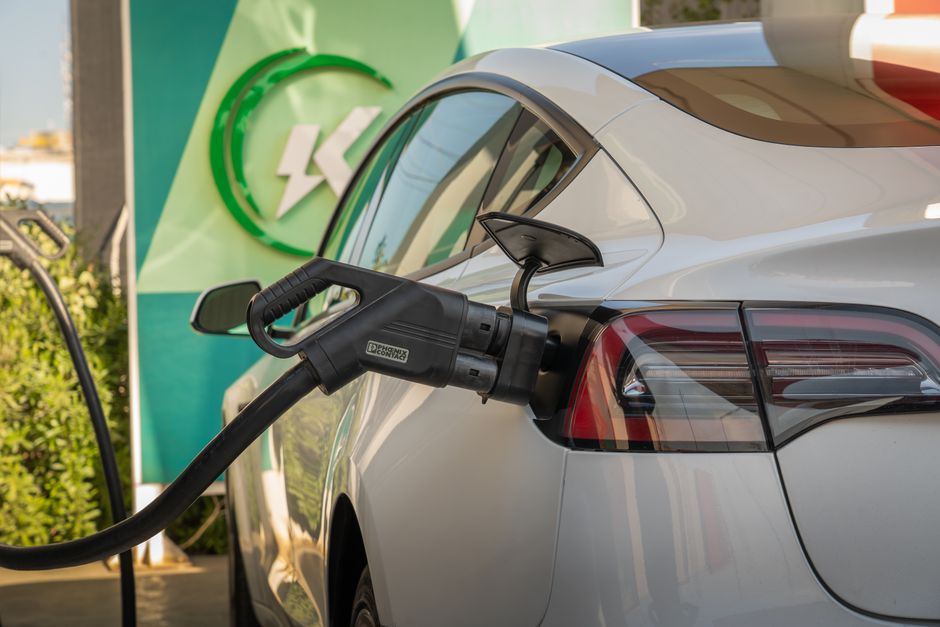
You bought the EV first. Or maybe you’re about to. And now someone, a neighbor, a coworker, a YouTube rabbit hole at midnight, has convinced you that free solar charging is possible. It is. But it’s not as simple as bolting panels to your roof and plugging in the car.
Get the sizing wrong, and you’ll spend real money while your utility bill stays stubbornly high. Get it right, and you’ll cover most or all of your charging costs and slash your household electricity bill at the same time. Here’s what I tell people at this exact crossroads: the solar-plus-EV combination is genuinely one of the best investments you can make in your home right now. But only if you design it intentionally from the start.
Why This Pairing Actually Makes Sense (And When It Doesn’t)
The math first, because this is where homeowners get surprised in both directions.
The average American home uses roughly 10,500 kilowatt-hours (kWh) of electricity per year. That’s your baseline. Now add an electric vehicle. The most common EVs on the road, Tesla Model 3, Chevy Bolt, Ford Mustang Mach-E, consume somewhere between 3 and 4 miles per kWh. Drive an average of 12,000 to 15,000 miles per year, and you’re adding roughly 3,000 to 5,000 kWh of annual electricity demand to your home.
That’s a 30-50% increase in consumption.
A solar system perfectly sized for your house before the EV is now undersized. This is the most common mistake I see: homeowners install solar for their current needs, buy the EV a year later, and only then realize they’ve outpaced their system.
There’s a timing problem too. EVs are almost always charged overnight or during off-peak hours. Solar doesn’t produce then. That mismatch is real, and it shapes how you design everything. You’ve got two main paths: sell excess solar back to the grid during the day through net metering and pull grid power at night for charging, or add battery storage so your solar production is available around the clock. Both work. The right one depends on your utility’s net metering policy and whether battery economics actually make sense in your area.
How to Size a Solar System That Covers Your EV
Read this section twice. Sizing is where people either get it right or spend years being quietly disappointed in their system.
Start with 12 months of electricity bills. You want actual kWh consumed each month, not just dollar amounts. Most utilities list this clearly. Add those up. Then estimate your EV’s annual consumption based on real driving habits, not manufacturer fantasy numbers. Use 3.5 miles per kWh as a conservative average and multiply by your actual annual mileage.
Say your home uses 10,000 kWh/year and your EV adds 4,000 kWh. Your target is 14,000 kWh/year. Now divide by your location’s peak sun hours. The National Renewable Energy Laboratory (NREL) has a solar resource map showing peak sun hours by ZIP code. Phoenix gets 5.5 to 6 peak sun hours daily. Seattle gets 3.5 to 4. Divide your annual need by 365, then by your peak sun hours, and you’ll get a rough kilowatt (kW) system size.
For our 14,000 kWh example in a mid-sun location with 4.5 peak hours: 14,000 divided by 365 is about 38.4 kWh/day. Divide that by 4.5 and you get roughly 8.5 kW. Account for real-world system losses (about 14-20% from heat, wiring, inverter efficiency), and you’re probably looking at a 9 to 11 kW system.
That’s meaningful. Not huge, but solidly above the national average install size of around 6 kW. Get quotes for the right size upfront rather than trying to expand later, because adding panels to an existing system often costs more per watt than doing it correctly the first time.
The EV Charger Decision: Level 1, Level 2, or Smart Charger
Build Your Own SOLAR POWER SYSTEM | Simple & Affordable Off-Grid Setup · DIY Tiny Home on YouTube
| Charger Type | Voltage | Range Added Per Hour | Best For | Installation Cost |
|---|---|---|---|---|
| Level 1 | 120V | 3-5 miles | Low daily mileage (30-40 miles) | Minimal (existing outlet) |
| Level 2 | 240V | 20-30 miles | Most EV owners; solar optimization with smart scheduling | $800-$2,100 (charger + electrical work) |
| Smart Level 2 | 240V | 20-30 miles | Solar homes; time-of-use rate optimization | $800-$2,100 (charger + electrical work) |
Your existing outlet probably isn’t good enough, but let me explain what you’re actually choosing between.
Level 1 charging is a standard 120-volt household outlet. It delivers roughly 3-5 miles of range per hour. Drive 30 or 40 miles a day? That’s 6 to 10 hours of overnight charging. It works. It’s slow, genuinely slow, but some drivers find it fine.
Level 2 uses a 240-volt circuit, same as your dryer or range. A Level 2 EVSE (Electric Vehicle Supply Equipment) delivers 20-30 miles of range per hour, sometimes more depending on your car’s onboard charger. Most EV owners want this within six months of owning the car.
For a solar-plus-EV system, a smart Level 2 charger is worth serious consideration. Devices like the ChargePoint Home Flex or Emporia Smart EV Charger let you schedule charging for peak solar production times, typically midday. If you’re home during the day or can set a timer, you’re actually running your car almost entirely on solar-generated electricity rather than grid power. Smart EV chargers are available on Amazon (the site may earn a commission on purchases through this link) and are often cheaper than what an installer will supply.
Budget around $800 to $1,500 for the charger, plus $200 to $600 for electrical work if you don’t already have a 240-volt circuit in your garage. If your panel is older or at capacity, you may need a panel upgrade, which is a separate conversation with your electrician.
Battery Storage: Do You Actually Need It?
Battery storage, primarily the Tesla Powerwall, Enphase IQ Battery, and Franklin WH series, is the most frequently oversold add-on in residential solar. I’ve seen installers push it on every single customer regardless of whether it makes financial sense. Here’s an honest framework.
You probably benefit from battery storage if your utility has reduced or eliminated net metering (check your utility’s current tariff, because policies have changed significantly in California, Nevada, and other states in the last two years), you have frequent grid outages and want backup power, or you’re on a time-of-use rate where electricity costs significantly more in the evening than midday.
You probably don’t need it right away if your utility offers full retail net metering, your budget is tight and the payback math doesn’t work for batteries yet (it often doesn’t), or your only priority is offsetting EV charging costs and reducing your overall bill.
A 10 kWh battery like a single Powerwall typically runs $12,000 to $15,000 installed. That’s a serious addition to an already serious solar investment. The U.S. Department of Energy’s homeowner guide on going solar covers the tradeoffs well and is worth reading before you decide. Batteries can be added after the fact if your system is designed with the right inverter and conduit pathways, so don’t feel pressured to commit on day one.
Permits, HOA Considerations, and Contractor Red Flags
This is where people get blindsided because nobody volunteers this information until you’re deep into a contract.
Every grid-tied solar installation requires a permit from your local building or planning department and approval from your utility company for interconnection. This isn’t optional. Any installer who suggests otherwise isn’t someone you want on your roof. Permit timelines vary wildly: some jurisdictions turn permits around in a week online, others take six to ten weeks. Ask your installer how long permits typically take in your specific city before you assume a timeline.
If you have an HOA, rules vary by state. Many states have solar access laws that limit an HOA’s ability to prohibit solar, but they often still allow requirements around placement, aesthetics, and equipment specifications. Get the HOA approval process started in parallel with your permit application, not after.
Watch for these contractor red flags:
- No physical office or local license number. Verify your installer is licensed in your state. Don’t take their word.
- Pressure to decide before the site assessment is complete. A real installer will do a roof inspection and shading analysis before finalizing a quote.
- Quotes without specific panel model and inverter brand. “300-watt panels” without a manufacturer name is a problem.
- No mention of production monitoring. Every modern system should include monitoring so you can see actual output daily.
- No detail on warranty. You want the panel manufacturer’s warranty (typically 25 years) and a separate workmanship warranty from the installer (10 years is standard).
Pair your system with a home energy monitor like the Emporia Vue (the site may earn a commission on purchases through this link) from the start. Real-time visibility into consumption, solar production, and EV charging load is genuinely useful and makes it easier to catch problems early.
Step-by-Step: Designing Your Solar + EV Setup
| Step | What to Do | Watch Out For |
|---|---|---|
| 1. Audit your usage | Pull 12 months of utility bills. Add estimated EV kWh. | Don’t use manufacturer range estimates. Use real miles driven. |
| 2. Check net metering | Contact your utility or check their website for current tariff. | Net metering policies change. Verify the current rate, not what you read two years ago. |
| 3. Assess your roof | Check age, material, shading from trees or neighboring structures. | Roofs under 10 years old are ideal. Older roofs may need replacement before solar. |
| 4. Get 3+ quotes | Use NREL’s solar installer database or EnergySage to compare. | Compare the same system size. Don’t compare a 9 kW quote to an 8 kW quote on price alone. |
| 5. Choose your EV charger | Decide on Level 2 or smart charger and get the circuit run. | If you’re doing solar and EV install together, coordinate so the electrician runs both at once. |
| 6. Apply for permits | Installer handles this, but confirm they pull the permit before work starts. | Ask for the permit number and verify it with the city if you want peace of mind. |
| 7. Utility interconnection | Installer files for this, but it must be approved before you can turn the system on. | Don’t let anyone turn the system on before interconnection approval. Serious safety and legal issue. |
| 8. Monitor and adjust | Watch production vs. consumption for the first 3 months. | If output is consistently lower than estimated, contact your installer. |
Getting solar and EV charging right is one of those projects that rewards patience and planning. The homeowners most satisfied with their systems are the ones who took a few extra weeks to understand their utility’s policies, got the system sized for their actual future usage, and didn’t let a pushy sales timeline rush them into a suboptimal decision. Take your time, get specific about your numbers, and don’t hesitate to ask installers hard questions. The right ones will welcome it.
Sources
- Smart EV chargers are available on Amazon
- home energy monitor like the Emporia Vue
- Govee WiFi Smart Plug with Energy Monitoring
- Renogy 100W 12V Flexible Solar Panel
- Jackery SolarSaga 100W Solar Panel
Disclosure: As an Amazon Associate, we earn a small commission from qualifying purchases at no extra cost to you. We only recommend products that genuinely support the topics covered in this article.
- Renogy 200W Solar Starter Kit + 30A Charge Controller (~$169), Complete beginner solar kit, 200W monocrystalline panel, charge controller, and mounting hardware included.
- Renogy 2×100W Monocrystalline Solar Panels (~$99), Expandable 200W panel set from the most trusted DIY solar brand, used widely in off-grid and home backup systems.
Photo: 04iraq via Pexels
Recommended Resources
Disclosure: As an Amazon Associate, we earn a small commission from qualifying purchases at no extra cost to you. We only recommend products that genuinely support the topics covered in this article.
- Renogy 200W Solar Starter Kit + 30A Charge Controller (~$169), Complete beginner solar kit, 200W monocrystalline panel, charge controller, and mounting hardware included.
- Renogy 2×100W Monocrystalline Solar Panels (~$99), Expandable 200W panel set from the most trusted DIY solar brand, used widely in off-grid and home backup systems.





