 David Torres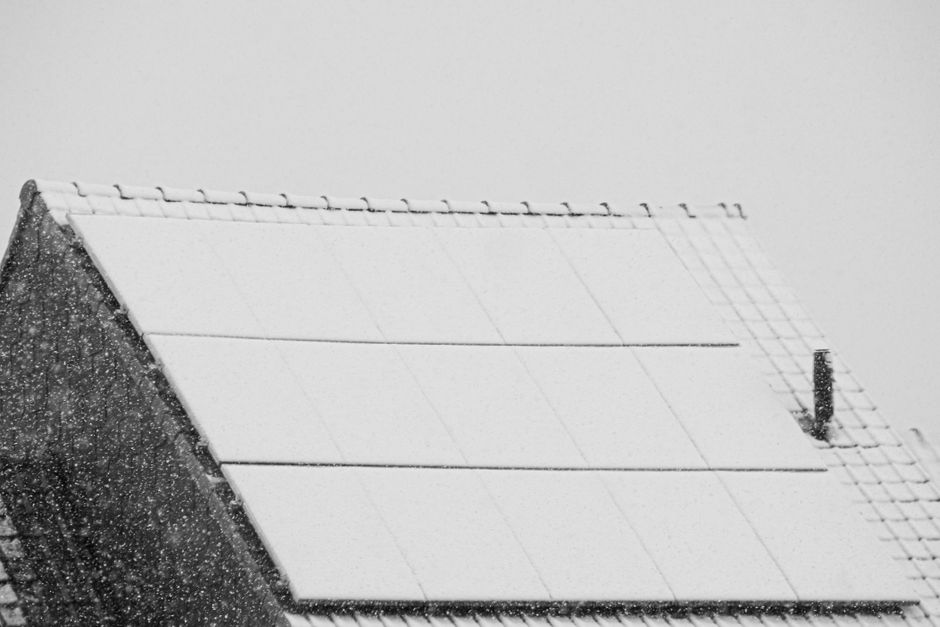
Three inches of fresh snow on a Monday morning, and your solar system output has dropped to near zero. I’ve seen this exact situation trigger a full-blown panic call from a homeowner who was convinced their inverter had failed. Turned out the panels were just buried. Happens constantly in the first winter after installation, because most installers spend exactly zero time on snow management during the sales process.
Here’s what I want to save you: the time I wasted the first winter I had a system on my own roof in Colorado. I grabbed a standard roof rake, dragged it across the panels, and put a hairline scratch across two cells before I’d even cleared half the array. Not catastrophic, but a dumb and avoidable mistake. Snow removal on solar panels has a few specific rules that differ from clearing your roof shingles, and if nobody’s told you those rules, this is that conversation.
- Most residential panels can handle 40-50 lbs/sq ft of snow load, but clearing early prevents shading losses that cut output by 80-100%.
- Never use metal tools, standard roof rakes, or rock salt on panels , surface damage voids most manufacturer warranties.
- A dedicated solar panel snow rake (soft foam head) costs $40-$90 and is the safest DIY option for single-story roofs.
- Steep roof pitches (above 35 degrees) usually self-clear within 1-2 days; shallow pitches below 15 degrees may need manual help.
- Automatic heating systems and anti-reflective coatings exist but rarely pencil out for most homeowners , know when they make sense.
Why Snow Actually Matters More Than You Think
A partial shade condition is worse than total shade, and snow creates partial shade constantly. If one panel in a string is 60% covered, it can drag down the output of every other panel in that string depending on your inverter setup. With a conventional string inverter system, I’ve personally measured output losses of 70-85% on a day when only a third of the panels had significant coverage. Microinverters or DC optimizers (like SolarEdge or Enphase systems) handle this better because each panel operates more independently, but you’ll still lose whatever output the covered panels would have contributed.
EnergySage’s market data shows that homeowners in snowy climates lose an average of 3-5% of their annual production to snow coverage, but that number hides the real story. It’s spread unevenly, concentrated in the short, low-sun days of December and January when you can least afford the hit. A clear panel on a cold February day in Denver can actually outperform the same panel on a hot July afternoon, because cold temperatures improve efficiency. You want those panels clear.
What You Can and Cannot Use
Helpful resource: Govee WiFi Smart Plug with Energy Monitoring is a top-rated option for this. (As an Amazon Associate this site earns from qualifying purchases.)
This is where I see the most damage done, usually by well-meaning homeowners who grab whatever’s in the garage.
What works:
A foam-head solar panel snow rake is the answer for most single-story and accessible second-story installations. The Roof Razor (around $45 on Amazon) has become the go-to for a lot of DIYers, though the extension poles are a separate purchase. For solar-specific work, the DocaPole with a soft-bristle or foam attachment (roughly $65-$85 depending on length) gives you enough reach without the metal contact risk. (Disclosure: this site may earn a small commission on Amazon purchases.)
Warm water from a garden hose works in borderline temperatures, roughly 35-40°F, when the snow is light and hasn’t bonded to the glass. Don’t use hot water. The thermal shock between hot water and a very cold panel surface can stress the glass, and on a day that drops below freezing again, you’ve just created a better ice bonding surface.
What you should never use:
Metal roof rakes. Standard push brooms. Ice scrapers. Rock salt or calcium chloride, both of which leave residue that degrades the anti-reflective coating over time. A pressure washer in freezing temps is asking for cracked glass.
What most people don’t realize is that the glass on a solar panel isn’t the same as your car windshield. The low-iron tempered glass used on most panels is designed for impact resistance (hail), not scratch resistance. A metal edge that would barely mark your car hood can leave a visible scratch on a panel face.
The Right Technique, Step by Step
Total Cost Breakdown of our Solar Power System & How Many Years to Pay for Itself. · Country View Acres (Formerly Smalltown442) on YouTube
Before you touch anything, check the weather. If temps are dropping overnight, ice is going to bond whatever you don’t finish. Better to wait for a full clear day.
- Work from the bottom of the panel upward, pushing snow down off the lower edge. Going top-down means you’re dragging snow across the full panel surface with resistance, which increases scratch risk.
- Keep the rake head as parallel to the panel surface as possible. Don’t angle it like you’re scraping; use light downward pressure and let the snow’s own weight help.
- For ice that’s bonded to the surface, don’t force it. A de-icing spray formulated for solar panels (a few brands exist; check that it’s pH neutral and alcohol-based) applied the night before a clear day is safer than mechanical force.
- Stay off the roof if you can. Seriously. A wet, snow-covered roof with solar panel conduit and junction boxes is a fall hazard that isn’t worth the production gain for most people. If your pitch is too steep for safe ground-level raking, hire someone with a safety harness or wait for natural melt.
One practical detail nobody mentions: when you’re raking in cold temps, the foam or rubber head will stiffen. Give it about 10 minutes in a warm space before heading out, or you’re essentially working with a semi-rigid tool that won’t conform to the panel surface the way it should.
Comparing Your Options: Costs and Trade-offs
| Method | Upfront Cost | Ongoing Cost | Risk Level | Best For |
|---|---|---|---|---|
| Foam-head snow rake (DIY) | $45-$90 | Minimal | Low (if done right) | 1-2 story, accessible roof |
| Professional snow removal | $0 upfront | $75-$200/visit | Very low | Any roof, steep pitches |
| Panel heating systems (wire mats) | $500-$2,500 installed | Electricity cost | Very low | High-snow climates, flat/low pitch |
| Anti-icing coatings (applied at install) | $150-$400 per array | Reapplication ~$80 every 3-5 yrs | Very low | Works best on steep roofs |
| Waiting for natural melt | $0 | $0 | Zero hardware risk | Steep roofs, 2-3 day windows |
As of July 2026, panel heating mat systems have come down in price from where they were a few years ago, but I’d still tell most homeowners in moderate-snow climates to skip them. The math just doesn’t work: if you’re losing $50-$80 in production per winter season to snow, a $1,500 heating system with electricity costs isn’t recouping that investment in any reasonable timeframe. I don’t have solid data on payback period for very heavy-snow climates like northern Minnesota or the UP of Michigan, so if that’s you, I’d get a localized calculation before spending the money.
Your Roof Pitch is Doing Most of the Work Already
If your array is on a roof pitched steeper than about 35 degrees, there’s a reasonable chance you don’t need to do much. Snow slides off steep surfaces within 24-48 hours under normal temperature conditions. The Solar Energy Industries Association (SEIA) notes that most residential roofs in northern states are designed with pitches that naturally shed snow, which is part of why solar installations in places like New England still perform well annually despite heavy winters.
Flat roofs and low-pitch installations (under 15 degrees) are the real problem cases. Panels mounted flush or nearly flush to a flat commercial or residential roof will hold snow for days. If you’re planning a flat-roof installation and you’re north of roughly the 40th parallel, ask your installer to build in a steeper tilt angle on the racking. Even going from 5 degrees to 15 degrees of tilt dramatically improves self-clearing. I’ve watched an installer skip this conversation with a client in Rochester, New York, and that homeowner spent three winters manually clearing a system that could have been designed to clear itself.
Practical Scenarios Worth Walking Through
Scenario 1: Homeowner in Madison, Wisconsin with a 7.2 kW system on a 22-degree pitch gets 8 inches overnight in January. Waits 36 hours, panels self-clear about 40%, then uses a Roof Razor on the remaining coverage. Total clearing time: 20 minutes. Production impact: roughly one full day of generation lost, estimated at $4-$6 based on local utility rates. Not worth any heroic measures.
Scenario 2: Same homeowner, but the system is on a garage with a 10-degree pitch. The 8 inches doesn’t move for four days. At an average January production rate of about $3.50/day, that’s $14 lost plus the risk of a partial-shading penalty on adjacent strings. Manual clearing on day two would have recaptured roughly $10 of that. This is when the $65 rake earns its keep.
Scenario 3: A reader emailed me last spring from Syracuse, New York (one of the snowiest cities in the contiguous U.S.) asking whether panel heaters were worth it on a low-slope roof. Her system loses roughly 6-8% of annual production to snow, which at her system size (9.4 kW) translates to about $180-$220 per year in lost production value. A heating mat system at $2,000 installed would take 9-11 years to pay back in saved production, assuming electricity costs for the heaters stay modest. She went with a combination of steeper racking on a future east-wing addition and a good rake. Right call.
Sources
- Solar Energy Industries Association (SEIA): Industry data on residential solar performance, installation best practices, and climate-related production impacts.
- EnergySage Market Data: Annual solar shopper surveys and installer pricing benchmarks, including regional production estimates.
- National Renewable Energy Laboratory (NREL): Research on photovoltaic system performance under various weather and soiling conditions.
- Interstate Renewable Energy Council (IREC): Standards and installer training guidelines referenced in field best practices.
Photo: Budget Bizar via Pexels
Recommended Resources
Disclosure: As an Amazon Associate, we earn a small commission from qualifying purchases at no extra cost to you. We only recommend products that genuinely support the topics covered in this article.
- Renogy 200W Solar Starter Kit + 30A Charge Controller (~$169), Complete beginner solar kit, 200W monocrystalline panel, charge controller, and mounting hardware included.
- Renogy 2×100W Monocrystalline Solar Panels (~$99), Expandable 200W panel set from the most trusted DIY solar brand, used widely in off-grid and home backup systems.





